Quick start: SSO connection
This guide sets up the SSO connection of the acme organization. People whose address ends in @acme.com will then sign in to Hikube with their company account.
Before you start
- The Super admin tier on the organization.
- Administrative access to your identity provider.
- A confidential web application, dedicated to Hikube, registered at your provider, with its client id and secret: Okta, Microsoft Entra ID, Google Workspace or Auth0.
Checklist
- Claims in the ID token.
email, the first name, the last name and, if you use it, the roles claim must be in the ID token. Hikube reads them nowhere else. - Address confirmation. Leave Confirm the address by a link enabled, unless your provider sends
email_verifiedin the ID token. Microsoft Entra ID does not send it. - PKCE. Leave it enabled, unless your provider refuses it.
- Roles claim. Set it only if your provider must decide the tiers (see role bindings).
- Second factor. The MFA of SSO accounts is enforced by your provider, not by Hikube.
- Invitation or not. By default, any person from an allowed domain whom your provider lets through gets an account. Invitation required only admits invited people.
- A super admin with a password. Keep at least one: it is your fallback access if your provider is unavailable.
The full technical requirements are in Concepts.
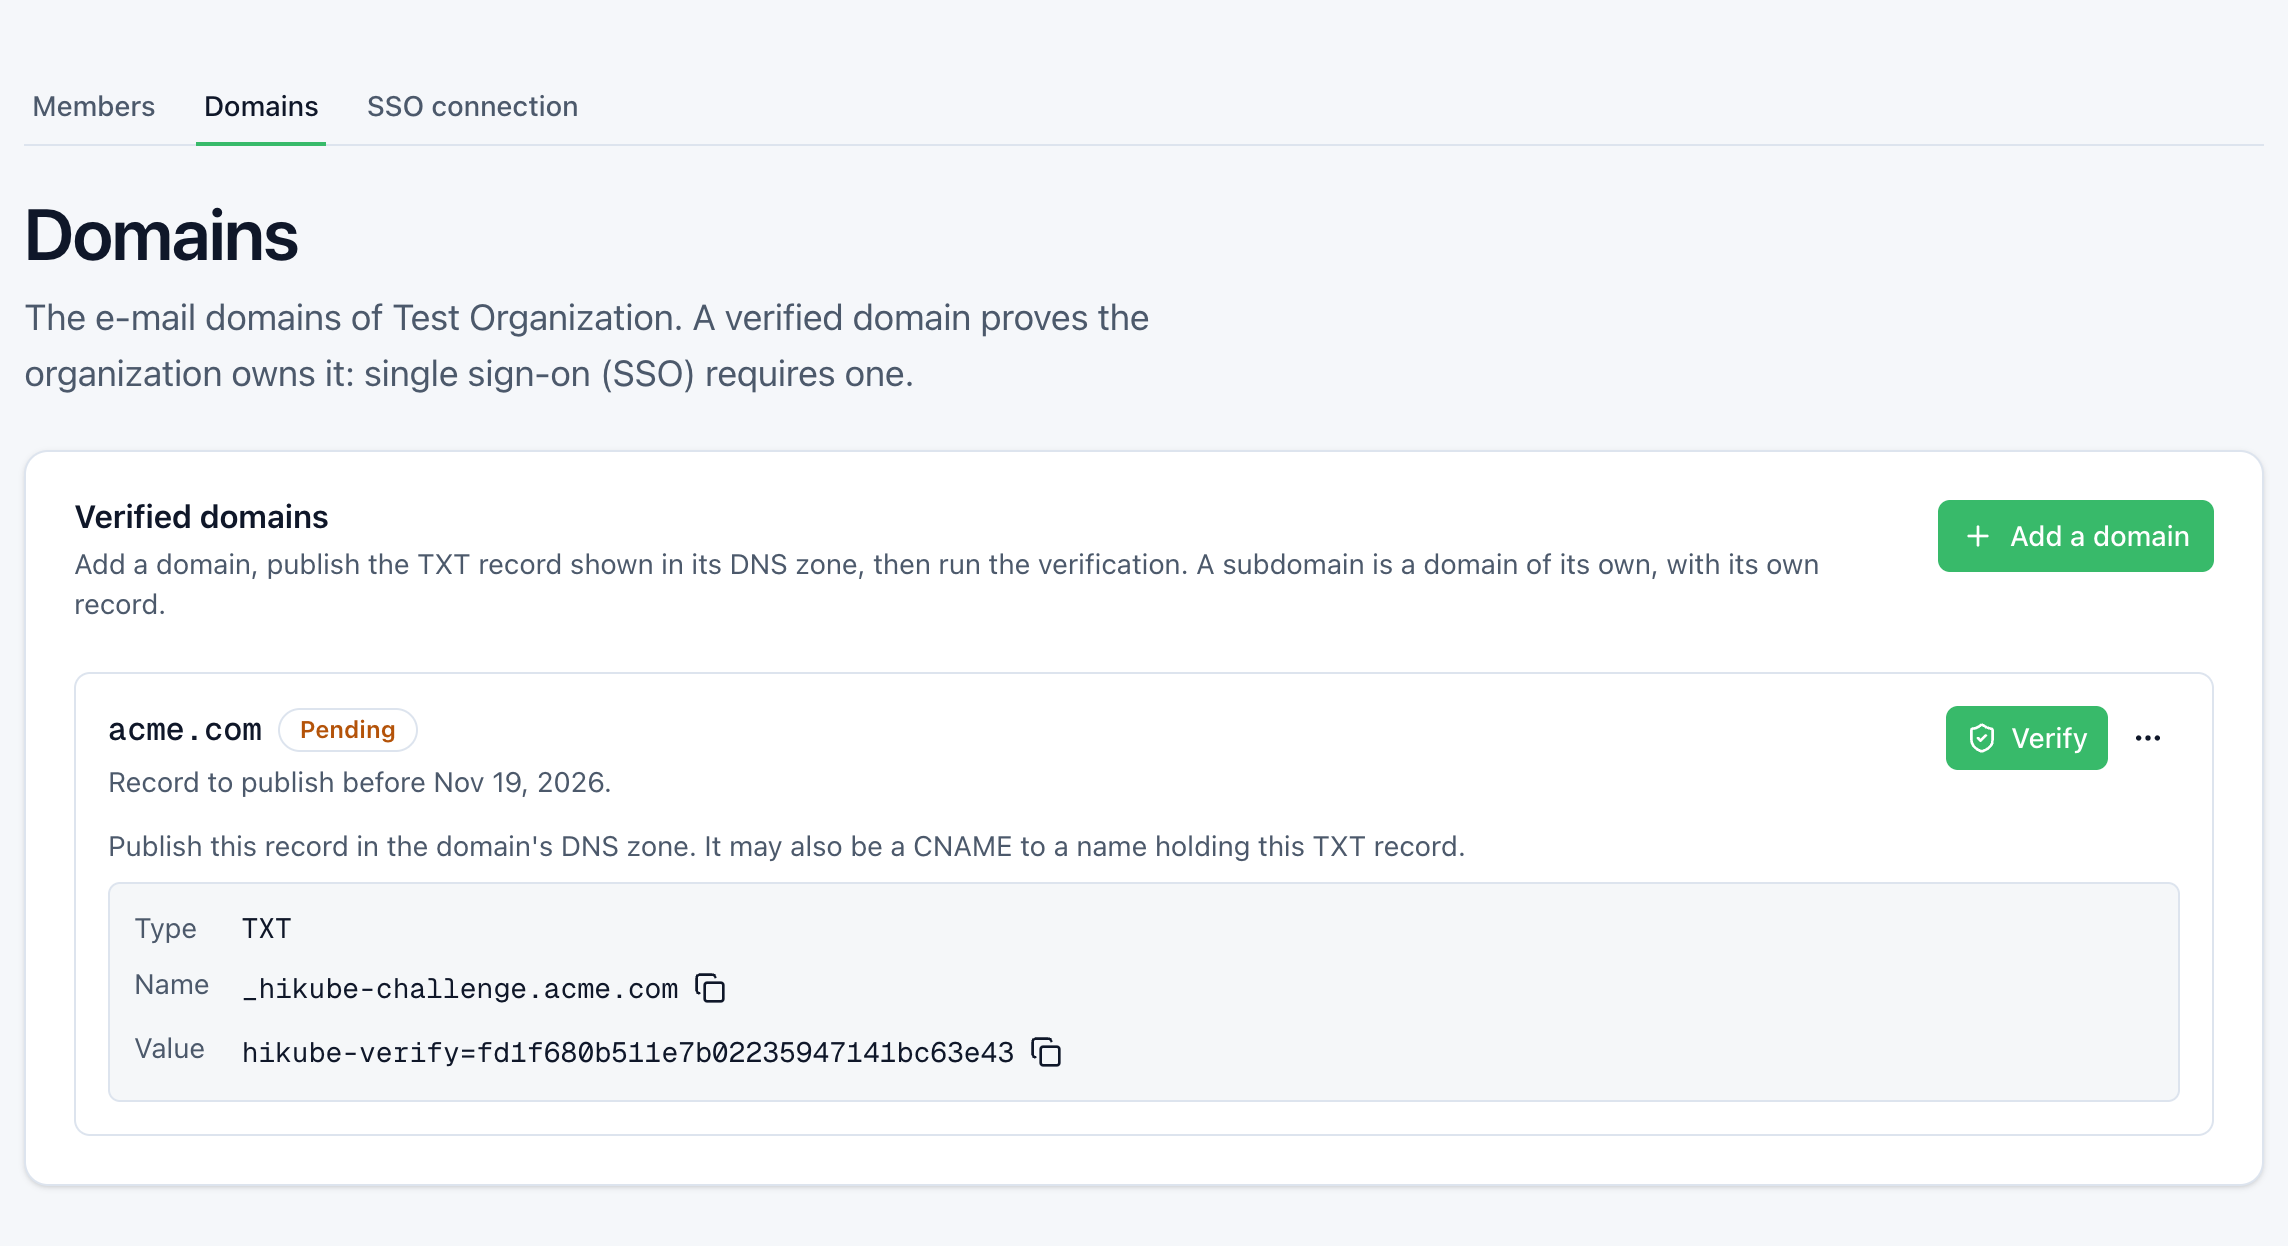
Step 1: Verify the domain
- Your profile menu → Organization members, Domains tab.
- Add a domain:
acme.com, then Add. - Publish the
TXTrecord shown in the DNS zone ofacme.com. - Click Verify.
Expected result: acme.com has the Verified status. Details: Verify a domain.
Step 2: Create the connection
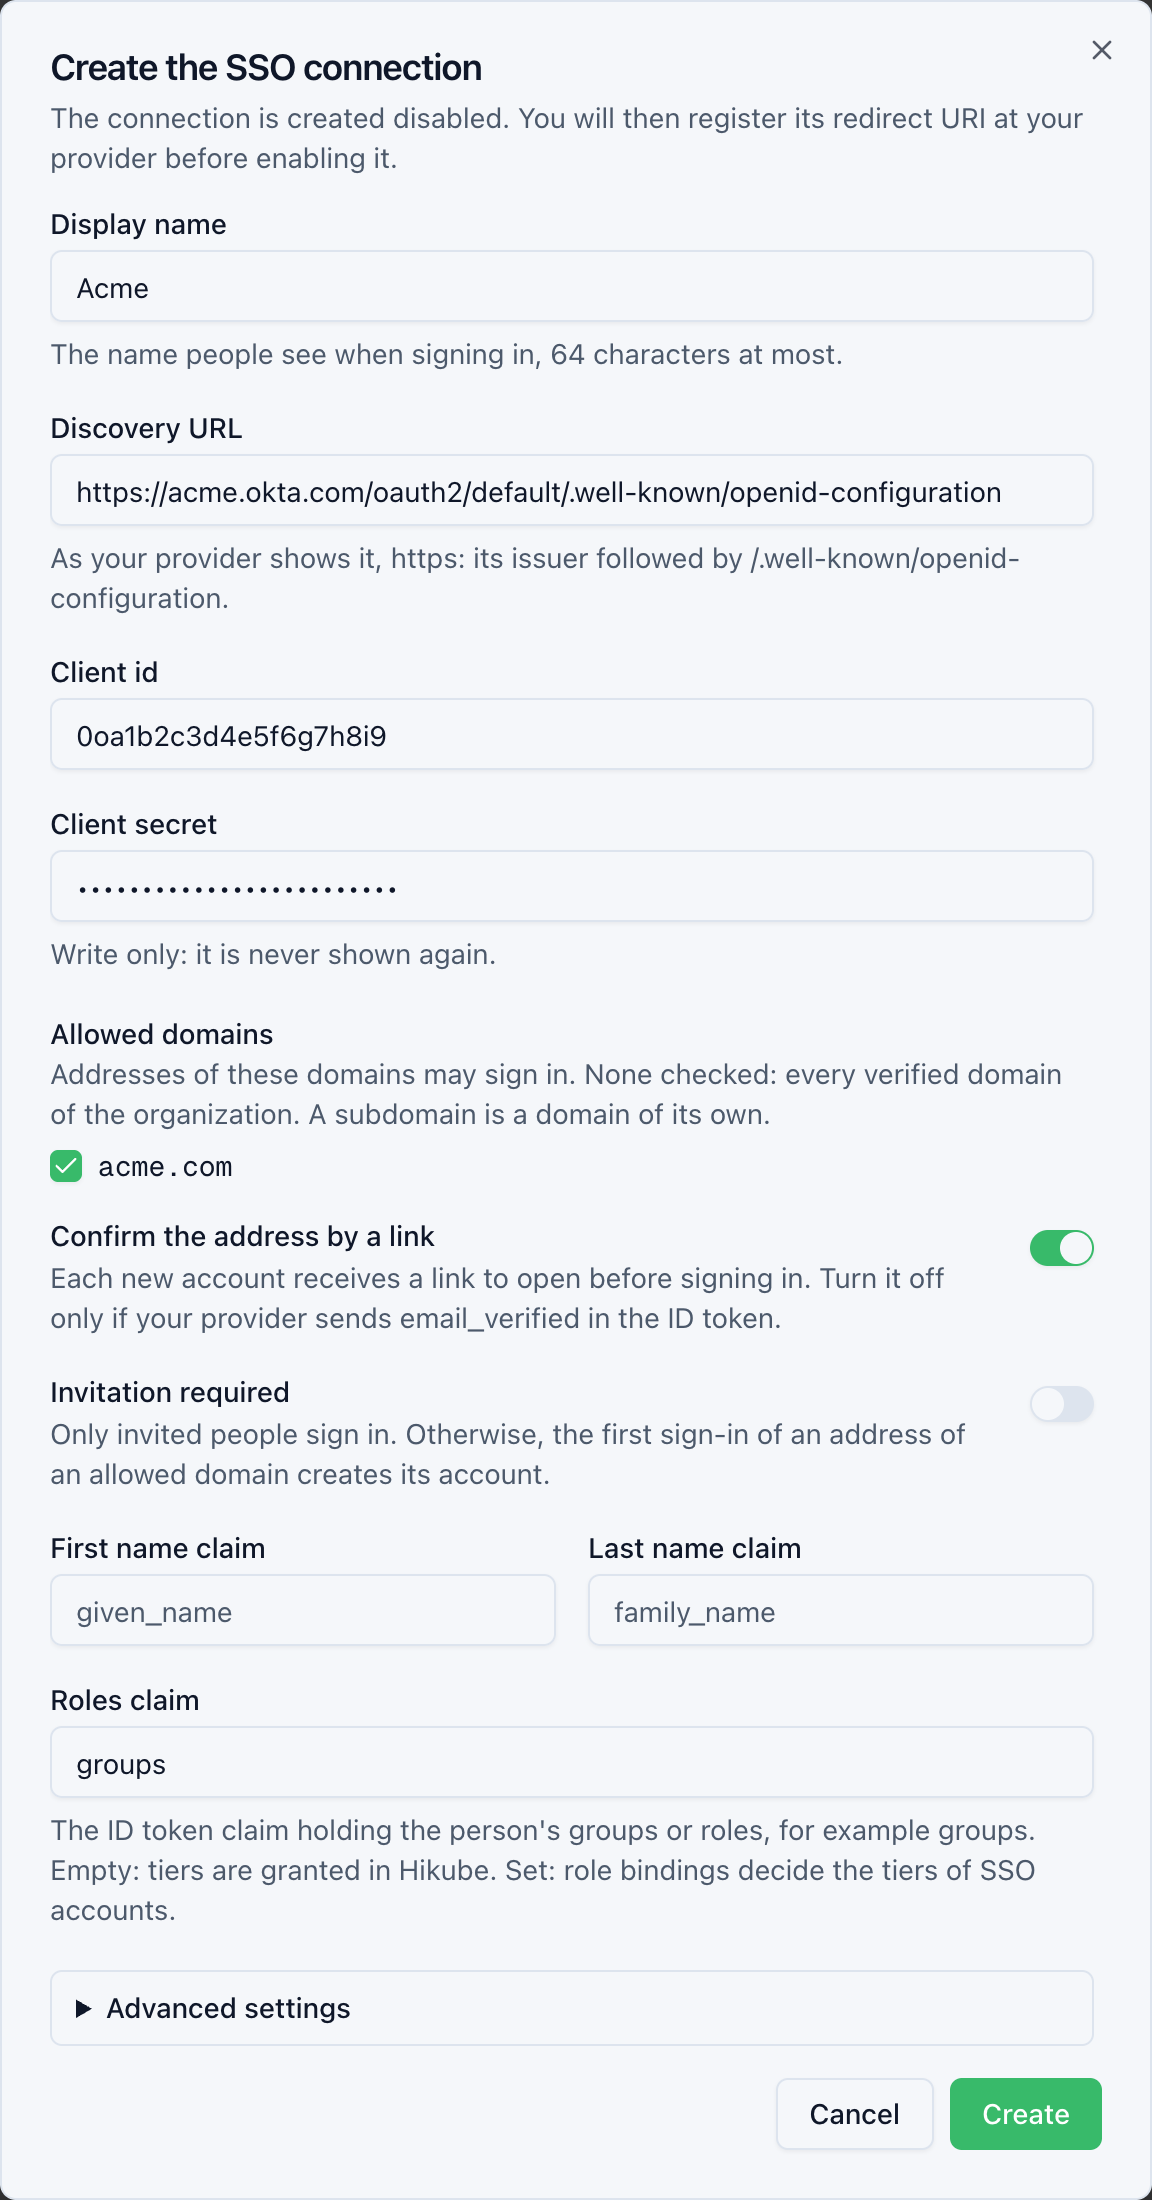
- Open the SSO connection tab, then click Create the connection.
- Fill in at least:
- Display name:
Acme; - Discovery URL:
https://acme.okta.com/oauth2/default/.well-known/openid-configuration; - Client id and Client secret: those of the application;
- Allowed domains: check
acme.com.
- Display name:
- Click Create.
Expected result: SSO connection created. The connection is Disabled. All the fields are described in Configure the SSO connection.
Step 3: Register the redirect URI and enable
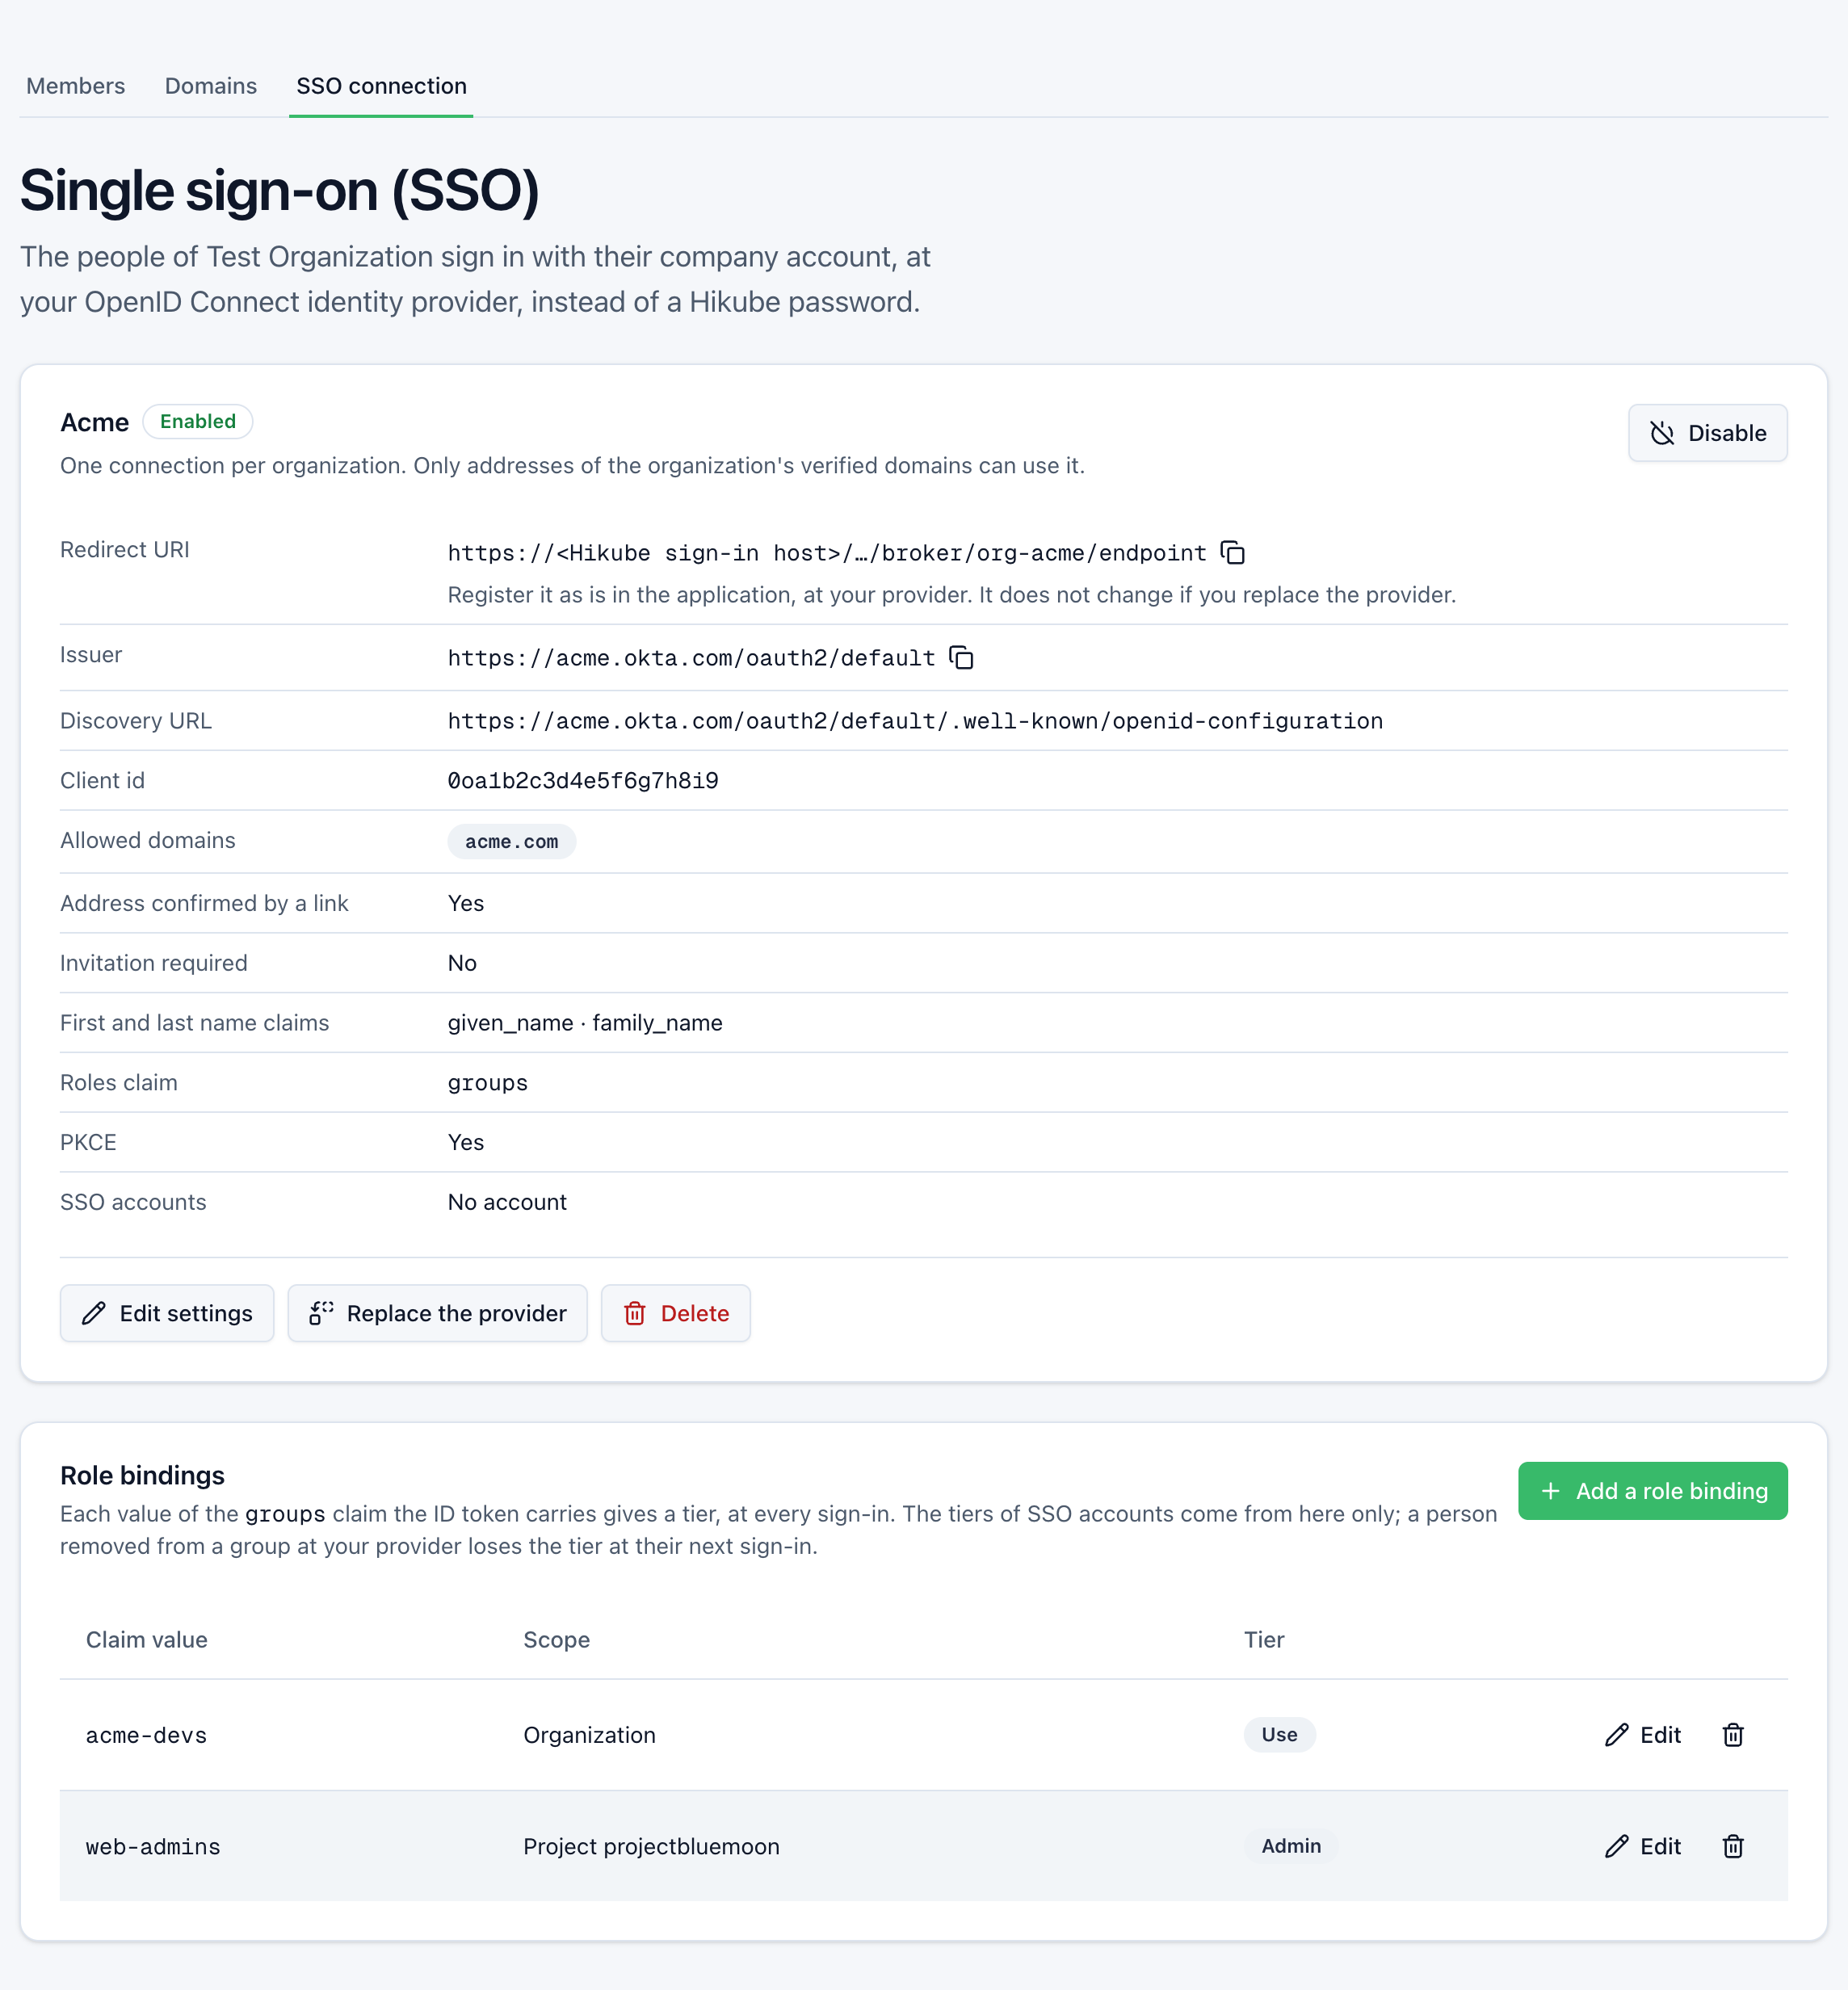
- In the SSO connection card, copy the Redirect URI.
- At your provider, paste it as is into the application.
- In Hikube, click Enable.
Expected result: SSO connection enabled. The status changes to Enabled.
Step 4: Test the connection
- Open a private browsing window on console.hikube.cloud.
- Enter an
@acme.comaddress that has no Hikube password. - Sign in at your provider.
- Open the confirmation link received by e-mail.
Expected result: the person reaches the console. They appear in Organization members with the No tier badge.
Step 5: Grant tiers
- Without a roles claim: on the person's row, Edit, then choose their tier (see Manage members).
- With a roles claim: create one role binding per group (see Grant tiers from your provider).
Expected result: after a refresh, the person sees the projects of their tier.
Step 6: Quick troubleshooting
| Symptom | Probable cause |
|---|---|
| Creation refused, discovery URL | Copy the URL as your provider shows it; the issuer must match |
| Enable refused | The domain is not verified, or its TXT record has disappeared |
| Redirect URI error at the provider | The registered URI is not exactly the console's |
| Person refused | Address outside the allowed domains, or person not assigned to the application |
| Signed in without access | No tier granted, or no role binding matches their token |
More cases: Troubleshooting.
Step 7: Disable or delete
- Disable: nobody signs in through your provider any more. SSO accounts and their access are kept.
- Delete: the SSO accounts created by the connection are deleted.